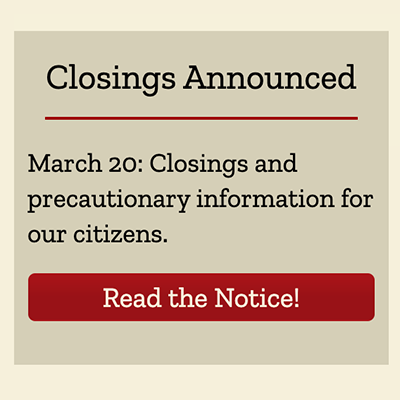
On the left is a mockup of what your post box will look like on either the home page (in a “post grid”) or on the Public Notices Desktop page.
The top line of info comes from the POST TITLE. The little red separator line and the button are automatic.
The blurb of text comes from the POST EXCERPT. Read on for how to set up your post.
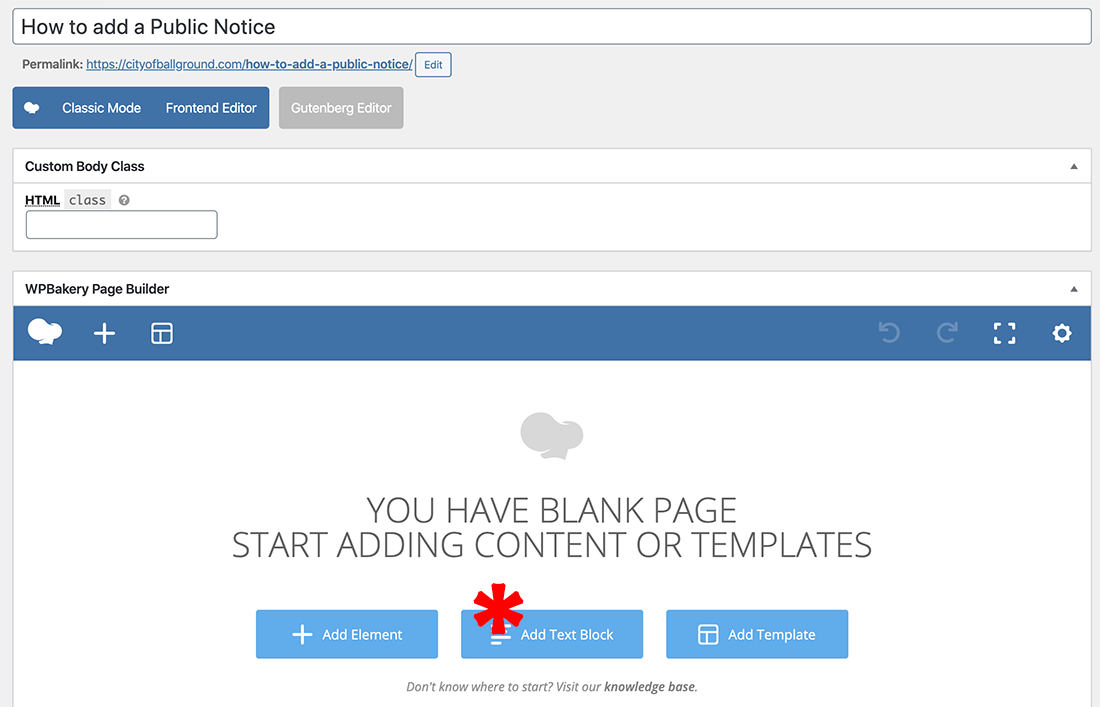
In the Dashboard, go to Posts, Add New. When the screen comes up, click Backend Editor. See image below for a screenshot.

You will get a screen that looks like the one below. Click Add Text Block to begin.

When you mouse over your text block, you’ll see the little green edit image pop up. Click the pencil to begin editing. Type your notice in this box adding whatever formatting you need to. Save changes.
Next, you need to add the Post Excerpt. Scroll down the screen until you see the box that looks like the image below. Type a short synopsis of your notice here. Remember, this is what you will see below the red line on the little blocks (like the image at the top of this page). Short! Sweet!


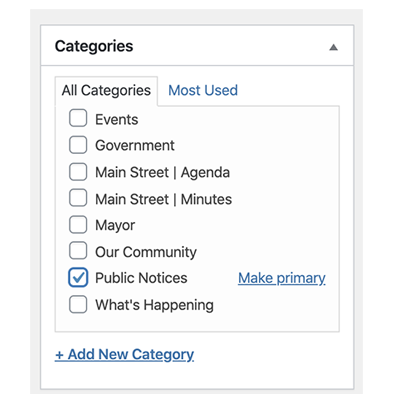
Make sure (double sure) to check the category Public Notices before you save the post. It should be the ONLY category checked.
When you have completed these steps, click Publish. The post will automatically appear on the home page and also on the Public Notices Desktop page. If you find that you don’t like the length of your post title, come back to the post itself to edit. Same with the post excerpt. Just edit either of those and click Update.


